

Step 1: Add key store pages
You’ve found some products, made a Shopify account, and listed your first product.
Great. Now it’s time to set up the rest of your store. This involves creating several key web pages that all ecommerce websites should feature.
Luckily, Shopify offers plenty of free guides and templates for creating these, which I’ll link to throughout this article.
Let’s quickly cover each key store page one at a time.
Business pages
The most important page on your entire website is the Homepage.
Think of it as your digital shopfront; if it’s ugly, customers aren’t going to care about what’s inside.
For tips on creating a great homepage, check out this guide. Or just copy the design of your competitors’ websites. Try not to make it too obvious, though.
Alongside the homepage are two more web pages all ecommerce websites need: About and Contact.
Despite its name, the “About Us” page should really be speaking about your customer. Use the opportunity to relate to the things that have driven your customer to seek a product like yours, then present yourself as the solution right at the end.
Keep your Contact page clear and simple. Shopify allows you to add a contact form to your website that automatically syncs with the email address associated with your Shopify account.
FAQs, Policies, & Legal
Next up, the boring stuff.
Oops… I mean the really important stuff.
Your Shopify store needs to have the following pages:
-
-
-
Frequently Asked Questions: The FAQ page helps to build trust and reduce the number of customer service questions in your email inbox. If you’re not sure what FAQs to include, check out your competitors.
-
Privacy Policy: A good Privacy Policy protects both your company's and your customers’ security. Shopify has a free template you can use – just remember to fill in the blanks with your specific company details.
-
Terms & Conditions: Similar to the Privacy Policy, this page is essential for every ecommerce store. Shopify has a template for this document, too.
-
Shipping & Returns Policies: It’s important customers can find out how you handle returns and how long delivery takes. Shopify has an entire guide and another free template for this as well.
-
-
Wow, thanks Shopify! All those templates sure make the technical stuff easy for new sellers.
Now they’re out of the way, let’s talk about themes.
Step 2: Customise theme and layout
Here’s where you create the foundational aesthetics for your site. Don’t worry about the design and branding specifics – we’ll cover those in the following article.
For now, let’s just get those foundations up.
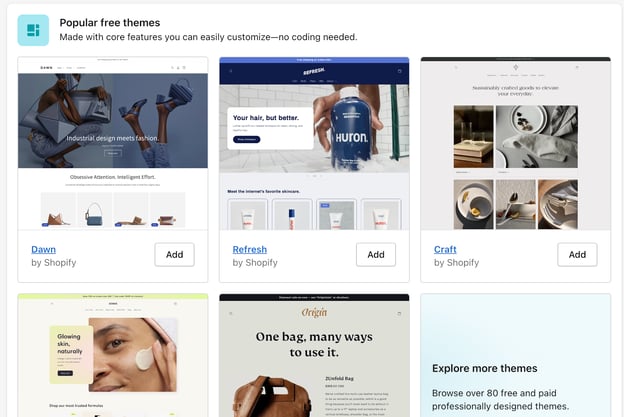
You can begin by selecting a Shopify theme. Go to Online Store > Themes to find one.
Bear in mind that you can change your theme at any time, so don’t get too hung up on which one to pick.
Adding blocks and sections
After you’ve chosen your theme, it’s time to put some dressing on the salad.
In other words, this is the part where you fill your empty pages up with unique sections known as blocks.
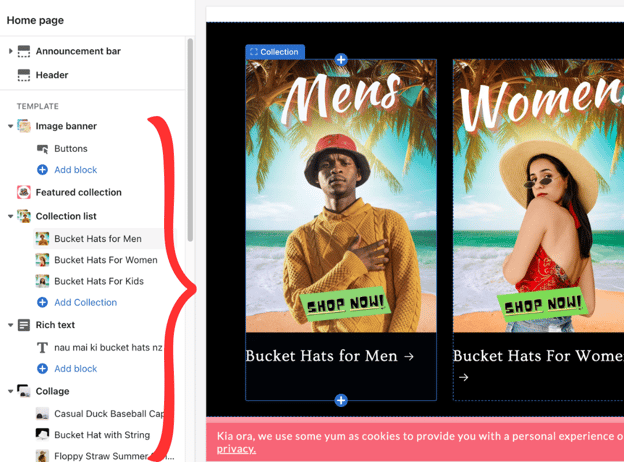
Depending on your chosen theme, you’ll have a range of predefined blocks you can add to the website.
Take some time to research which sections are ubiquitous across all successful ecommerce sites and make sure yours matches the norm.
Step 3: Configure business settings
The last step in building your Shopify store is to fill in the fine print.
Though a little tedious, you need to configure your business settings before launching your store to the public.
Here’s what that entails.
Online store preferences
First, go to Online Store > Preferences and enter the key details that affect the front-end (customer-facing) side of your store.
These include:
-
-
-
Homepage SEO title
-
Homepage SEO meta description
-
Pixel tracking data (if you’re planning to use Google or Facebook advertising)
-
Customer data collection and privacy settings
-
-
If you’re not sure what to enter for these, perform some online research first. These sections are very important, and getting the last one wrong can result in legal issues further down the road.
Shopify settings
Lastly, select Settings from the bottom left-hand corner of your dashboard.
This is where you can personalise and finalise your Shopify details. There are a lot of options here, but you don’t need to worry about all of them right now.
The sections you do need to complete are:
-
-
-
Payments
-
Shipping
-
Checkout
-
Taxes
-
-
Again, these are crucial to understand and get right as they affect how you get paid and touch on legalities. Perform the necessary research first to ensure you know what you’re doing.
If you’re worried about getting something wrong here or just want somebody to double-check your work, this is a good time to get in touch with an ecommerce accounting specialist.
Lucky for you, you’re only one click away from the best.
I personally use and recommend the team at Wise Advice. As I’m sure they’ll tell you, accounting for ecommerce is much harder than regular accounting.
Whether it’s now or after you’ve made some sales, you’ll need to enlist the help of an expert with knowledge of the industry.


.png)
